Large Batch Sandwich Bread Recipe (4 Loaves)
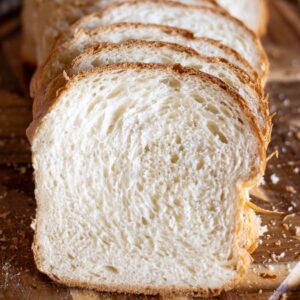
This easy large batch bread recipe makes soft, fluffy white sandwich loaves perfect for big families or stocking your freezer. Bake once, enjoy homemade bread all month—this foolproof recipe simplifies meal prep, saves time, and gives you bakery-quality results every single time!
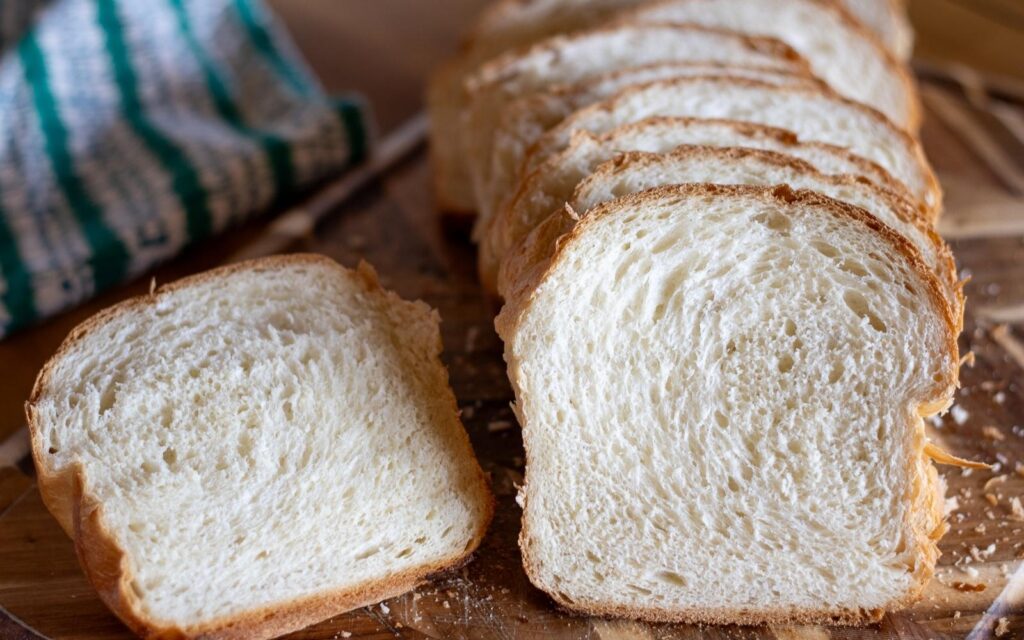
As a busy mom of 5 and homemaker of 10 years, I’ve baked hundreds of loaves—trust me, this large batch bread recipe is a game changer. Soft, fluffy white sandwich bread that’s perfect for feeding a big family, simplifying meal prep, and stocking your freezer! It’s also a sandwich bread recipe that doesn’t crumble—perfect for thick spreads and sturdy slices.
Why You’ll Love This Recipe
- Budget-friendly – Significant cost savings compared to store-bought premium bread (around $1.96 per loaf!).
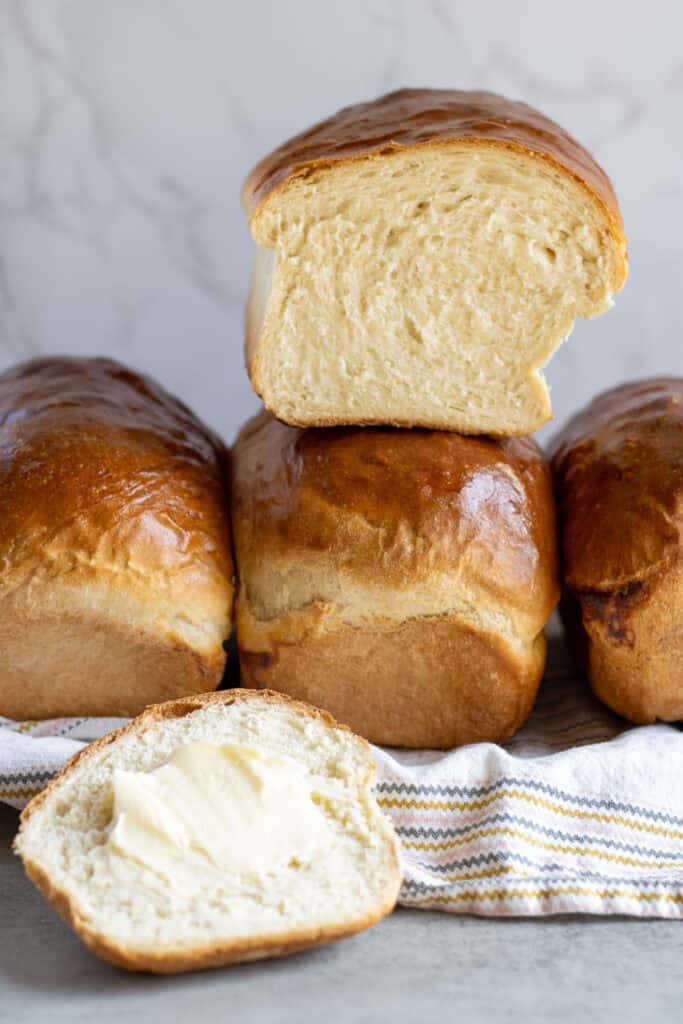
- Makes 4 loaves – Enough bread to last our big family a full week. If you don’t have as many mouths to feed, these loaves freeze beautifully and make it easy to have homemade bread on hand anytime.
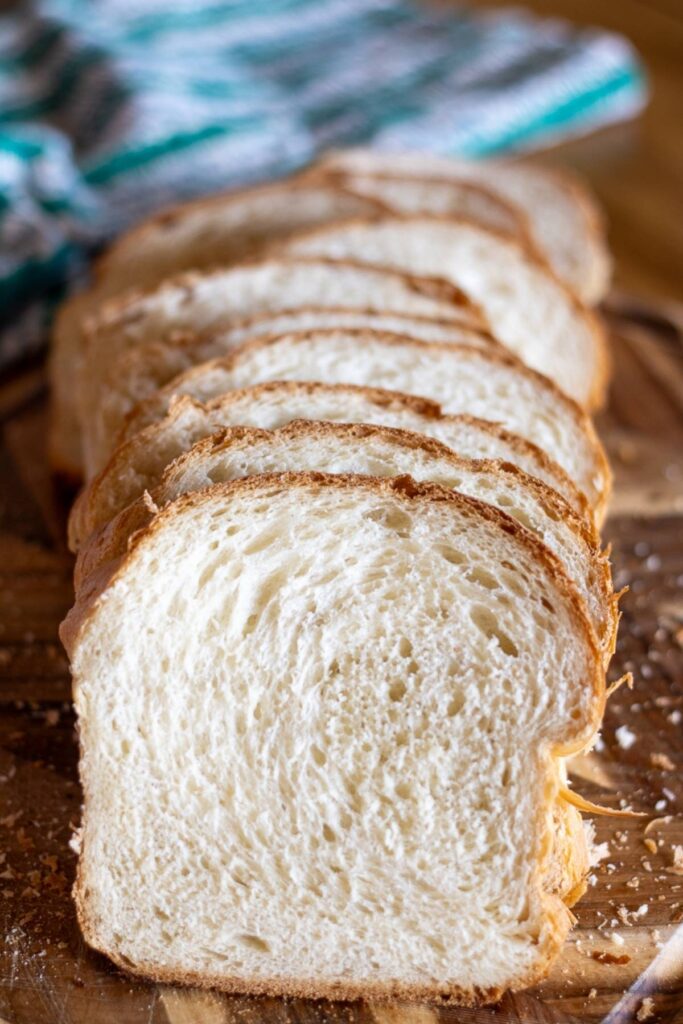
- Soft, sturdy texture – This bread is tender but strong—it won’t crumble or tear when you spread peanut butter or not-so-soft butter on it. Great for sandwiches, toast, or grilled cheese.
- No fancy ingredients – Just pantry basics and a mix of all-purpose and bread flour for the perfect balance of softness and strength.
- Flexible process – Works well by hand, or in a stand mixer with a dough hook.
This make-ahead sandwich bread is perfect for bulk baking—whether you’re prepping for a busy week or stocking your freezer for the month ahead.
Cost Breakdown: Homemade vs. Store-Bought Bread
One of the compelling reasons I love baking this bread at home is the significant cost savings compared to store-bought varieties. Using high-quality ingredients like King Arthur bread flour and organic unbleached all-purpose flour from a big-box store, the total cost for baking a family-size batch of four loaves comes to about $7.84—that’s only around $1.96 per loaf! Considering the cost of premium sandwich bread at the grocery store, homemade bread isn’t just tastier and healthier, it’s budget-friendly too!
Why Bake Large Batch Bread?
When you’re feeding a crowd, baking in bulk isn’t just frugal—it’s essential. Baking a batch of four full-size sandwich loaves means you can stock the freezer, prep ahead for busy days, or share with a friend or neighbor.
Store-bought bread may seem convenient, but have you noticed how it barely molds anymore? It makes you wonder what’s really in it. I’d rather stick with simple, wholesome ingredients I trust—and with this recipe, I know exactly what’s going into each loaf.
Plus, this bread is as practical as it is delicious. We homeschool, so lunch happens at home every day. One of my favorite things is how sturdy this bread is—you can spread a thick layer of peanut butter on it without worrying about tearing or crumbling. It holds up beautifully and makes even the simplest sandwich feel special.

Step-by-Step Instructions
1. Proof the yeast
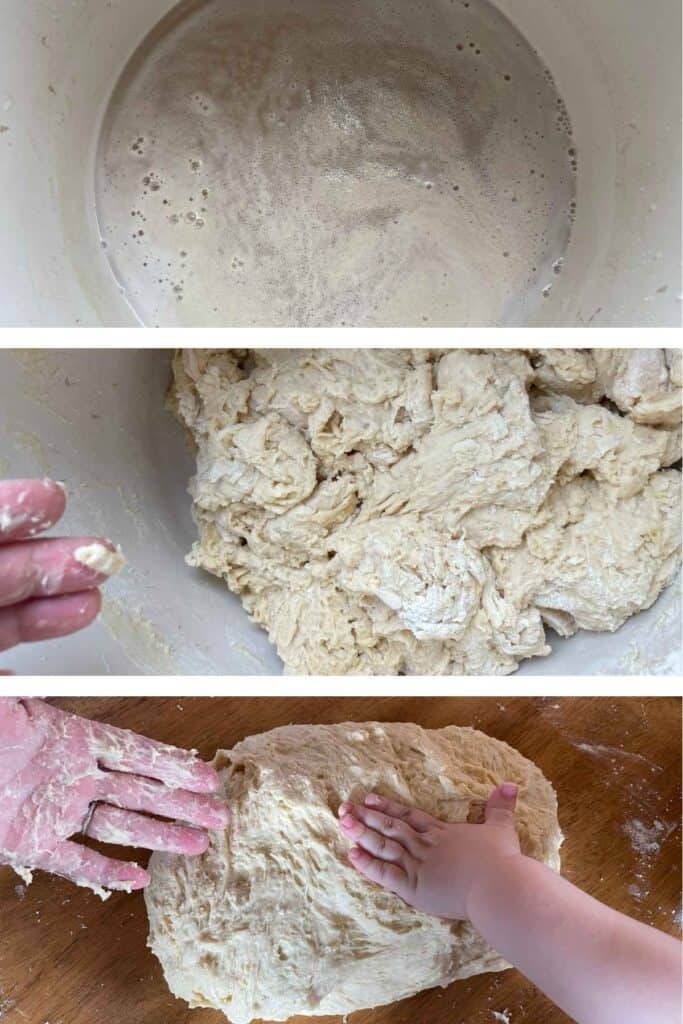
In a large mixing bowl, stir the sugar and yeast into the warm water, between 105 and 115 degrees F. Let it sit for 5–10 minutes, until the surface is foamy and bubbly. This shows your yeast is active and ready to work.
2. Add the fat and salt
Pour in the melted (but slightly cooled) butter and stir in the salt. You don’t want the butter to be so hot that it kills the yeast. Just give it a test by dipping your finger in, and if it’s not too hot to touch, it should be good!
3. Mix in the flour
Start adding your flour — 6 cups of unbleached all-purpose and 6 cups of bread flour — one cup at a time if you are using a stand mixer. I mix by hand, so I just dump it all in at once. Mix with a wooden spoon until a shaggy dough forms. At this point, it doesn’t need a thorough mix — just bring it all together. Cover the dough and allow it to rest for 30 minutes. This allows the flour to fully hydrate and makes kneading much easier.
4. Begin kneading
If kneading by hand: turn the dough out onto a floured surface and knead for 10–15 minutes until smooth and elastic. If your arms get tired, pause midway through and let the dough rest for 10 minutes — this rest actually helps gluten develop. Come back and finish the full kneading time. (See the video below to learn how to knead bread dough by hand.)
If using a stand mixer: Knead with the dough hook for about 8 minutes until the dough is stretchy and pulls cleanly from the bowl.
5. First “lift and tuck”
Turn the dough out onto a surface to perform the first set of “lift and tuck” folds. Grab a section of dough, stretch it up gently, and tuck it down into the center. Rotate the dough and repeat 6–8 times, forming a tight ball. See the video below to learn how to do this “lift and tuck” dough-handling method.
6. Rest and second “lift and tuck”
Place the dough back into the bowl, cover, and let the dough rest for 30 minutes. Then, repeat the lift-and-tuck folds a second time. This helps build structure. Cover again and let rise until doubled in size — about 30–60 minutes, depending on kitchen temp. (At 70°F, mine usually takes around 45 minutes.)
7. Shape the loaves
Turn the dough out onto a clean surface and divide it into 4 equal portions. Take one portion and gently flatten it into a rectangle, about 8 inches long. Starting from the long side, roll the dough up tightly into a log. Pinch the seam to seal, and gently tuck the ends under if needed. Place the shaped loaf seam-side down into a greased loaf pan. Repeat with the remaining dough.
8. Second rise
Cover the pans lightly and let the loaves rise until the dough domes about 1 inch above the rim — 45 to 60 minutes.
9. Preheat and bake
While the loaves rise, preheat your oven to 375°F. Optional: Score the tops with a sharp knife and brush with egg wash for a golden crust. Bake for 30–35 minutes or until deep golden brown. The tops should sound hollow when tapped, and internal temp should reach 190–200°F.
How do I know if my homemade bread is done baking?
Use a thermometer for best accuracy. If you don’t have one, tap the top of the loaf—it should sound hollow. If it still feels soft or sinks slightly when touched, it may need a few more minutes.
10. Cool completely
Let the loaves rest in the pans for 5 minutes, then turn them out onto a wire rack. Cool completely before slicing — this helps the crumb set and keeps slices from getting gummy.
Don’t stop at the recipe card!
After baking hundreds of loaves for my family of 7, I’ve gathered essential tips below the recipe card—including how to perfectly freeze bread, fix common baking problems, and delicious ways to customize your homemade bread. Keep scrolling for more real-life tested wisdom!
Large Batch Sandwich Bread
Equipment
- Large mixing bowl
- Measuring cups and spoons
- Loaf pans (4 total)
- Kitchen towel or plastic wrap (for covering dough)
- Wire cooling rack
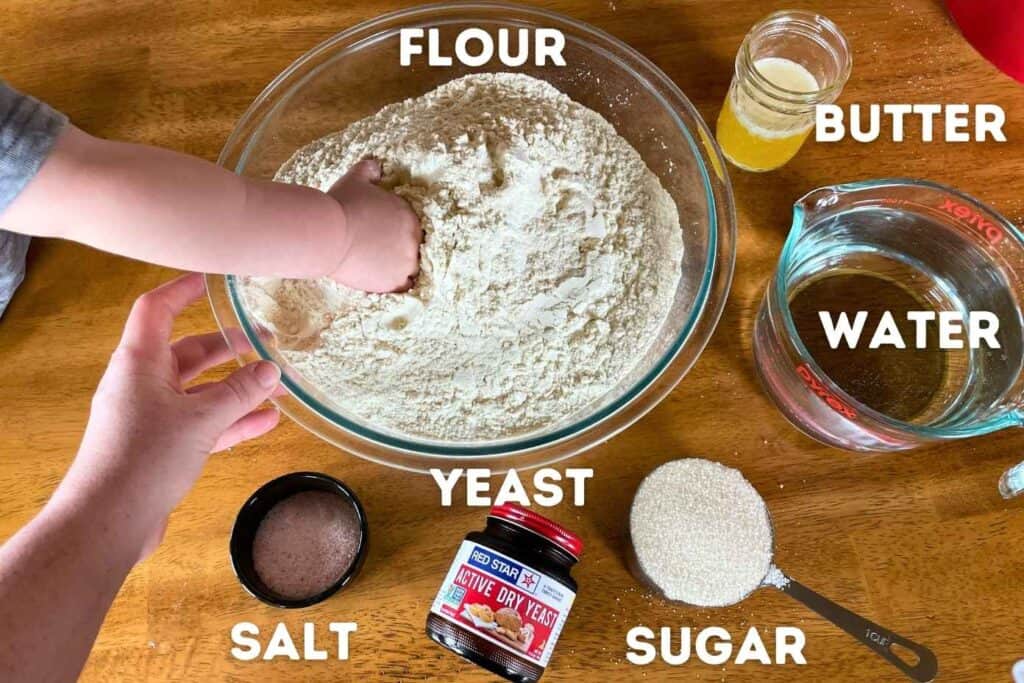
Ingredients
- 4 cups warm water between 105-115 degrees F (960g)
- 1 cup granulated sugar (200g)
- 3 tablespoons active dry yeast or instant yeast (27g)
- 1/2 cup unsalted butter, melted and slightly cooled 1 stick (113g)
- 2 tablespoons salt (36g)
- 6 cups unbleached all-purpose flour (720g)
- 6 cups bread flour King Arthur recommended (720g)
- egg wash optional, for brushing before baking
Instructions
- Proof the yeast: Combine warm water, sugar, and yeast in a large bowl. Let sit 5–10 minutes, until bubbly.
- Add butter and salt: Stir in melted (but not hot) butter and salt.
- Mix the dough: Add flours and mix until a shaggy dough forms. Cover and let rest for 30 minutes.
- Knead:Knead by hand for 10–15 minutes or 8 minutes in a stand mixer, until smooth and elastic.
- First lift and tuck: Turn the dough out onto a clean surface. Gently stretch a section of dough upward, then fold it down into the center. Rotate the dough and repeat 6–8 times to form a smooth, tight ball. Return the dough to a greased bowl, cover, and proceed to the next rest.
- Second lift and tuck + bulk rise:Rest dough 30 minutes, then repeat the lift-and-tuck folds. Cover and rise until doubled in size, about 30–60 minutes.
- Shape the loaves: Turn the dough out onto a clean surface and divide it into 4 equal portions. Take one portion and gently flatten it into a rectangle, about 8 inches long. Starting from the long side, roll the dough up tightly into a log. Pinch the seam to seal, and gently tuck the ends under if needed. Place the shaped loaf seam-side down into a greased loaf pan. Repeat with the remaining dough.
- Second rise: Cover and let loaves rise 45–60 minutes, until domed about 1 inch above the pan.
- Bake: Preheat oven to 375°F. Optional: score tops and brush with egg wash. Bake 30–35 minutes, until golden brown and internal temp reaches 190–200°F.
- Cool: Let loaves rest in pans 5 minutes, then cool for at least an hour on a wire rack before slicing.
Notes
- Makes 4 Loaves: Perfect for large families, freezing, or gifting. Plan ahead with storage space—these loaves go fast!
- Use Both Flours: This recipe calls for a mix of King Arthur bread flour and unbleached all-purpose flour. The combination gives the bread a soft, fluffy texture while staying strong enough for hearty spreads like thick peanut butter.
- Lift & Tuck Method: Don’t skip this step! It helps build structure so the bread doesn’t turn out crumbly. See video in post for the technique.
- Sticky Dough? That’s normal! Let the dough rest instead of adding more flour—it’ll become easier to handle as the gluten develops.
- Freezer-Friendly: Let loaves cool completely, then wrap tightly in plastic wrap or freezer bags. Thaw at room temp or reheat gently for fresh-tasting bread anytime.
- Cost Saving Tip: Each loaf costs about $1.96 to make using quality ingredients—far less than store-bought bread of similar quality.
Nutrition
Still with me? There’s more goodness below.
From bigger batch tips to soft crumb secrets, the rest of this post is packed with everything I’ve learned baking bread for a big family. Don’t miss the pro tips, simple add-ins, and real-life FAQs waiting for you just a scroll away.
Busy Mom Pro Tips: What 10 Years of Baking Bread Has Taught Me
- Don’t rush the process
It can be tempting to speed through the kneading or rising steps, but bread rewards patience. Make sure you knead for the full 10 minutes if working by hand—undermixing can lead to weak, crumbly slices. Letting the dough rest between steps gives the gluten time to relax, which makes shaping easier and the crumb more tender. - Sticky dough? Don’t panic
A slightly sticky dough is better than one that’s too dry. Avoid adding too much flour—rest the dough for 10 minutes, then come back to it. It will firm up as the gluten develops. Don’t sweat it if some tacky dough sticks to the table or your hand; just keep kneading, and it eventually smooths out. You can always wash! - Use a thermometer
For perfectly baked loaves every time, I rely on a digital thermometer. Bread is done when it reaches 190°F inside. No more guessing! - Make it your own
Sometimes I swap in 1–2 cups of whole wheat flour or add a handful of oats or flaxseed. This recipe is sturdy and forgiving—feel free to experiment. - Kids can help too
Even toddlers can dust the top with flour or help shape mini loaves. Making bread as a family is one of our favorite quiet day activities.

Freezing and Storage Tips
This bread was made to last—if your family doesn’t devour it immediately, it freezes beautifully!
- Cool completely first
Before freezing, make sure the loaves are fully cooled. Trapping steam can lead to soggy or freezer-burned bread. - Wrap well
Wrap each loaf tightly in plastic wrap, then place in a freezer-safe bag or airtight container. For extra protection, you can double wrap. - Freeze whole or sliced
I like to freeze a couple loaves whole and slice the others. Sliced bread is easier to grab one piece at a time for toast or sandwiches. - To thaw
Let thaw at room temperature for several hours or overnight in the bag. If you’re in a hurry, you can pop frozen slices right into the toaster.
FAQ
This is often due to under-kneading or over-proofing. Make sure you knead long enough to build gluten, and don’t let the dough rise too far past doubled. Also avoid cutting too soon—warm bread can crumble if sliced too early.
It probably needed more bake time. Ovens vary, and this recipe makes large loaves, so don’t be afraid to bake up to 40 minutes if needed. Use a thermometer to confirm an internal temp of 190–200°F. If the top is getting too dark, tent the loaves loosely with aluminum foil after 25–30 minutes to prevent over-browning while the inside continues to bake through.
Look for a deep golden crust, a hollow sound when tapped, and ideally, a thermometer reading. If the top caves or feels soft, give it more time.
The key is proper kneading. Inadequate gluten development is one of the most common reasons homemade bread falls apart. Be sure to knead long enough and resist the urge to add too much flour—the dough should be soft, stretchy, and slightly tacky. Letting the dough rise fully also helps strengthen the structure.
Around 70°F works well for most homemade bread recipes. That’s the temperature my kitchen was when I made this batch, and it took about 1 hour and 15 minutes for the bulk rise and 50 minutes for the final proof. If your home is colder, expect slower rise times—or place your dough in a warm (but turned off) oven to give it a gentle boost.
Alternatives and Add-Ins
Want to use whole wheat flour?
You can substitute half of the bread flour with whole wheat flour for added flavor and nutrition. Whole wheat absorbs more water, so increase the water by about 10–15%. That means adding an extra 1/4 to 1/3 cup of water to the original recipe. Start with the usual amount and add more gradually until the dough is soft and tacky—but not too sticky. Let it rest before kneading to give the flour time to absorb the liquid fully.
Honey-Oat Loaf
For a lightly sweet, wholesome variation, add 2–3 tablespoons of honey when you mix in the butter and salt. After shaping the loaves, brush the tops with a little water or milk and sprinkle with rolled oats before baking.
Seeded Loaf
To make a seeded sandwich bread, stir 1/4 to 1/2 cup of seeds (like sunflower, flax, or sesame) into the dough during mixing. You can also sprinkle more seeds on top after shaping—just brush the loaf with water or egg wash to help them stick.
👩🍳 Pro Tip: Divide Dough Evenly with a Scale
Want evenly-sized loaves that bake up beautifully and fit your pans just right? Grab a kitchen scale!
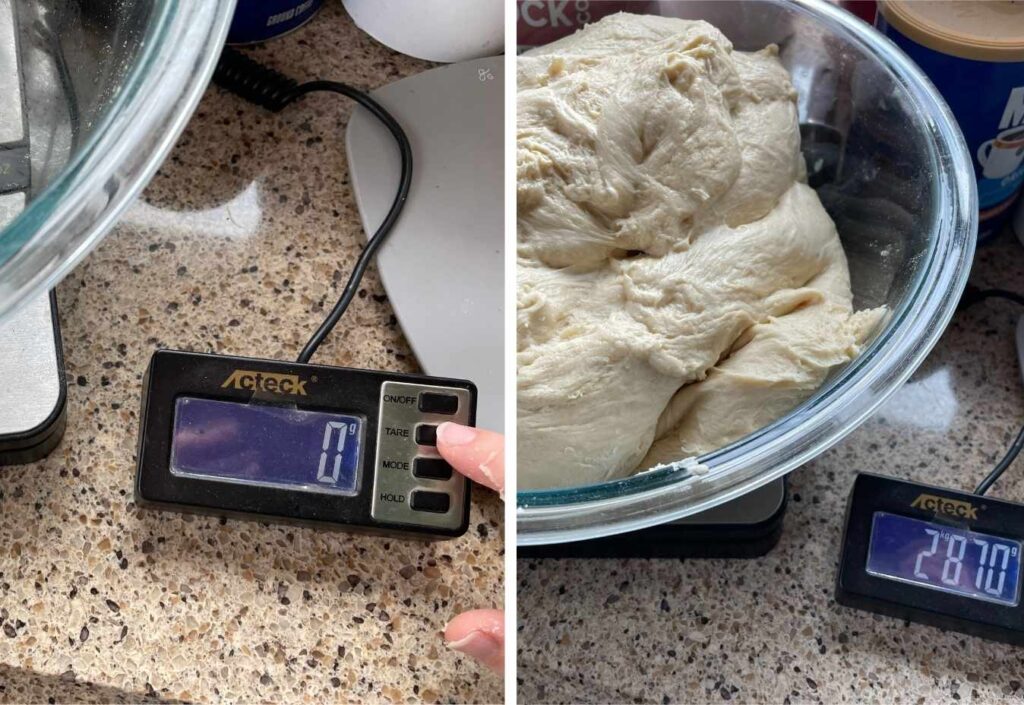
Here’s how:
- Lightly oil or flour a large bowl and place it on your scale.
- Zero out (tare) the scale, then add your dough to get the total weight in grams.
- Divide that number by 4 to get the weight for each loaf.
- Cut and portion the dough accordingly—no guessing or lopsided loaves!
This little step makes a big difference, especially if you’re freezing loaves or gifting them.
How to Scale This Recipe
This recipe makes 4 loaves, but it’s easy to double if you’re baking for a crowd or want to stock the freezer with homemade bread.
To make 8 loaves:
- 8 cups warm water
- 2 cups sugar
- 6 tablespoons active dry yeast
- 1 cup (2 sticks) butter, melted
- 4 tablespoons salt
- 12 cups unbleached all-purpose flour
- 12 cups bread flour
You’ll need 8 loaf pans and a very large mixing bowl (or mix in two batches). Expect slightly longer kneading and rising times due to the larger dough mass, but follow the same method step by step.
A Final Word
Thank you so much for stopping by my kitchen today. I hope this large batch bread recipe brings as much warmth and simplicity to your home as it has to ours. If you give it a try and it works well for you, I’d be so grateful if you left a 5-star rating on the recipe card—it really helps more families find this recipe and supports my work here. Happy baking!
More Bread Recipes to Try
Looking for more baking inspiration? Here are a few of our most-loved bread recipes to explore next, or browse my full collection of easy bread recipes here — from sweet loaves to savory classics, they’re all made to be simple, satisfying, and freezer-friendly.
- Easy Khachapuri Recipe (Georgian Cheesy Boat Bread) – A warm, cheese-filled bread boat that’s surprisingly simple to make and so fun to serve.
- Austrian Semmel (Easy Kaiser Bread Roll Recipe) – Soft, golden rolls with a classic twist pattern—perfect for sandwiches or dinner.
- Perfect 1-Bowl Sourdough Banana Bread – A moist, no-fuss banana bread that’s perfect for using up ripe bananas and sourdough discard.
💌 Prefer a warm, encouraging kitchen in your inbox?
Sign up for my emails and get practical kitchen inspiration, family-friendly from-scratch recipes, and real-life tips from a homemaker who’s been at it for over a decade.
As a bonus, you’ll also be invited to join our private Facebook community: Christian Homemakers’ From-Scratch Recipes—a faith-filled space for sharing recipes, homemaking wisdom, and sweet encouragement for the season you’re in.
“Pleasant words are as an honeycomb, sweet to the soul, and health to the bones.” — Proverbs 16:24
👇 Start here:
📬⬆️ (Sign-up for emails is just above!)
👭 Join the Facebook group »


This recipe is fantastic! Also a mom of many, I have tried lots of sandwich-type bread recipes over the years, and have never had the results that I got with this bread. My kids loved it, and it was so easy to throw together, even without a stand mixer. I will definitely be making this again and again!
Thanks so much for trying it out and leaving a sweet review! So glad you all enjoyed this white sandwich bread recipe.